Web Page Options
Page Name • Sub-Page Of • Page Type • Linking • Browser Title • Meta Description • Page Display • Company Info? • Login Form? • Headline • Left Sidebar Content • Main Content • Right Sidebar Content • Footer Message • Footer Link
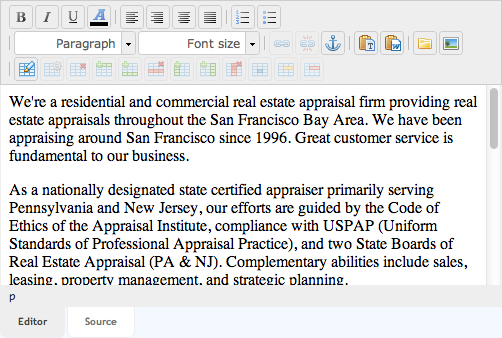
WYSIWYG Editor
Overview • Text Editing and Formatting • Links • Images • Tables • Advanced
When adding a new page or editing an existing one, you’ll see several fields. Some have popup tips ![]() to point at for details.
to point at for details.
PAGE NAME
What you put here will be what appears in the navigation links. Pick a naming scheme for all your page names like ALL UPPERCASE, or all lowercase, or All Title Case. Try to use one or two word names. Your home page should be called Home or Welcome.
SUB-PAGE OF
If you want this page to appear in a dropdown or sidebar menu, choose its parent page here.
PAGE TYPE
Most pages are Information pages, but you can also have one Order Form page, and multiple Contact Us and Landing pages. If you have more than one Order Form, the settings for orders forms will apply equally to both forms.
LINKING
Determines the navigation area that the link for this page appears in.
BROWSER TITLE
Used more by search engines than people. Put in three to five words (a phrase) that you want to rank well for, and that describes this page a little. Then put in a dash and your company name.
META DESCRIPTION
Sometimes used as the description of your page when your page shows up in search engine results. Use plain English, up to 255 characters.
PAGE DISPLAY
Determines wich content sections on your page are enabled (sidebar-content-sidebar). You can also turn your page off if you want without having to delete it entirely. Disabled pages don’t show up in the navigation links.
COMPANY INFO?
Determines whether to display the company info on this page, and if so, in which sidebar. Will only display in a sidebar, so be sure to also enable the appropriate sidebar (see Page Display section above).
LOGIN FORM?
Determines whether to display the login form on this page, and if so, in which sidebar. Will only display in a sidebar, so be sure to also enable the appropriate sidebar (see Page Display section above).
HEADLINE
Very important for both site users and search engines. Try to write a natural sounding headline that uses the search engine keywords or keyphrase you’d like to rank well for.
Body Content
LEFT SIDEBAR CONTENT
Enable it in the Page Display field described above, especially if you intend to show the company information or login form in this sidebar (see Company Info and Login Form sections above).
MAIN CONTENT
Where your main page content goes. Read WYSIWYG editor section further down this page for detailed instructions on how to enter site content.
RIGHT SIDEBAR CONTENT
Enable it in the Page Display field described above, especially if you intend to show the company information or login form in this sidebar (see Company Info and Login Form sections above).
FOOTER MESSAGE
Optional field holds 255 characters. Put a catchphrase here or something similar.
FOOTER LINK
Determines whether this page will be linked to from the footer navigation. Don’t enable for private pages that clients should be logged in to see. If you don’t want a page to appear anywhere but the footer, set its Linking to Orphan, and then enable its footer link.
The WYSIWYG Editor
The WYSIWYG content editor lets you edit sidebar and main content area content using a word-processor-like interface. Basic functions include text editing and formatting, and it can also handle links, images, tables, horizontal lines, and more.
Text Editing and Formatting
Just put your cursor in the editor and start typing. On the web, there are four kinds of text formatting:
- Unformatted text,
- Paragraph text,
- Headline text, and
- Text that really sticks out!
UNFORMATTED TEXT
This is the editor default when you just start typing stuff into it. You can leave text unformatted but then it won’t take on any font style definitions. So it’s a good idea to always format all text after typing it in.
To format text, either select it or just click somewhere within it, then change the Format dropdown selector to something else, like Paragraph.
PARAGRAPH TEXT
Paragraphs on the web work slightly differently than in a word processor. When you press Enter, instead of the cursor going down to the next line, it goes down two lines. This is to ensure that there’s always space between paragraphs.
Paragraphs should be short and sweet. Ideally they are about 15 to 20 words per line, and about 3 to 5 lines per paragraph. This makes it easy on the eyes. Always think of your website’s users when writing web content, and make it easy for them!
TIPS:
- If your text is formatted as a paragraph, and you press enter, the next line will automatically be formatted as a paragraph also. So you only have to manually format your first paragraph of text using the Format dropdown selector.
- To make the cursor go to the next line instead of skipping down two lines, press Shift-Enter instead of just Enter. You can use this to force line breaks.
HEADLINE TEXT
 Turn any unformatted or paragraph text into headline text by using the Format dropdown selector. Just select the text or click within it, then click the Format dropdown selector and choose Heading 1, Heading 2, or Heading 3. Ignore the other heading choices.
Heading 1 is the largest headline, Heading 2 is the next largest, and so on. Normally Heading 1 is used for the top headline in the page, and Heading 2 is used for any sub-heads. Search engines look at the contents of any Headings so use any search keywords in your headlines.
TEXT THAT STICKS OUT
 Use the Boldface and Italicize buttons to emphasize bits of text. Just select the text and then click the B or the I buttons. Although a U button (for underlining) is provided, avoid using it since on the web underlined text is assumed to be a link.
TEXT THAT REALLY STICKS OUT
 Use the Font Color button to change the color of selected text.
Center and boldface or italicize text
and it will really stick out.
JUSTIFICATION AND LISTS
 Use the justification buttons to left, center, right, and fully justify selected text. It’s best to use left justify instead of full justify. Use the bulleted lists or numbered lists buttons to create indented lists.
MORE ON TEXT FORMATTING
 If you create your text in Microsoft Word and then copy and paste it into the WYSIWYG editor, it might look kind of funny. To avoid this, copy it from Word, put your cursor in the WYSIWYG editor where you want the text to go, then click the Paste Formatted Text button.
Links
 There are five kinds:
- Links to other websites.
- Links to other pages on your own website.
- Links to other places on the same page.
- Email links.
- Links to download files such as PDFs, DOCs, RTFs, TXTs, and others.
They’re all created in a similar way: select the text you want to turn into a link, then click the Link button. A window pops up. What you enter depends on which of the 5 types of links you’re making.
LINKS TO OTHER WEBSITES
Enter the URL of the other website. The URL takes the form of http://www.thewebsite.com, or if you want to link to a specific page, include the page name in the URL like http://www.thewebsite.com/about.html
TIP:
- Easily find the URL by using your browser to go to the page you want to link to, then just copy the URL from the browser’s address bar.
LINKS TO OTHER PAGES ON YOUR OWN WEBSITE
Same exact idea as the previous type of link.
LINKS TO OTHER PLACES ON THE SAME PAGE
First you have to create a link anchor. Click in the editor where you want to create the link anchor and click the Bookmark icon. Give the link anchor a one-word name using just lower-case letters.
Next, select the text you want to turn into a link (that will link to the link anchor you just created). Click the Link button. Instead of putting in a URL, put in the hash symbol # followed by the name of the link anchor (no spaces). For example:
#section1
EMAIL LINKS
Select the text you want to turn into an email link and click the Link button. Instead of a URL, put in the word mailto followed by a colon : followed by the email address. It should all be in lower-case letters and there should be no spaces. For example:
mailto:info@valuedwebsites.com
LINKS TO DOWNLOAD FILES
Click where you want to put the file download link. Click the Link button. Click the folder symbol to the right of the URL field to open up the file manager. Click the Upload Files button and upload the file from your computer.
Images
For best results, pre-process pictures for web use (80% compression JPG format) before uploading them. For example, if you take a high-resolution digital camera photo and upload it directly to the web site, it will be very large and take a long time to load in the page whenever a site visitor looks at it.
 That said, let’s get started:
- Put your cursor where you want the image to go and click the Insert/Edit Image button. A window pops up.
- Click the Browse Server button. Another window pops up.
- Look for the "Upload a new file in this folder" field at the bottom, and click its Browse button.
- Navigate to the image file on your hard drive, select it, click OK, then back in the popup window click the Upload button at the bottom right of the window.
- Your picture will upload, then you’ll see a link for the new picture in the center of the window. Click that link.
- The second popup window will disappear, and you’ll be back in the first popup window, and you should be able to see a preview of the image.
- In the Alternative Text field, enter a brief description of this image. This is used by search engines and screen readers for the blind.
- If the width of the image is greater than 510 or 300 (as noted above), change the width to 510 or 300. This will smoosh the picture to fit into the web page. You should also reduce the height so that it remains in the same proportion. This is not the ideal solution for pictures that are too large for the web page, but it will do in a pinch.
- Experiment with the other fields and options if you like as described further on down.
- Press OK, and you should see the image in the WYSIWYG editor.
IMAGE OPTIONS
- Border: put in a number from 0 to 10.
- HSpace: the number of pixels between the image and any text it abuts horizontally. Put in a number between 15 and 20.
- VSpace: the number of pixels between the image and any text it abuts vertically. Put in a number between 15 and 20.
- Align: useful for making the text flow around smaller images. You’ll probably only ever use Left or Right.
In the Advanced tab, there’s a field called Style. For classy images leave the four above options blank, and copy and paste one of these two lines in there:
For left aligned-images put in
float: left; border:1px solid #ccc; padding: 3px; margin: 5px 15px 5px 0
For right aligned-images put in
float: right; border:1px solid #ccc; padding: 3px; margin: 5px 0 5px 15px
Tables
 Put your cursor where you want it, then click the Table button. A popup window will ask you for the number of rows, columns, and other information.
For width, if you want the table to span the entire content area, enter 100 for the number, and change px to %.
TIP:
- In the table editor popup, px stands for pixels, which are the dots on your screen. 1px is 1 dot wide, 5px is 5 dots wide, and so on.
Advanced
 The Source button lets you view and directly edit HTML code. If you know HTML, this can be useful. If you don’t, then you’ll probably want to stay away from this button. It can be used to enter JavaScript and CSS into the content, which can make the page look terrible if you don’t know what you’re doing.
For more information or if you have any questions please email info@valuedwebsites.com